Passion Fruit Crepes

It’s passion fruit season! A sweet and tart passion fruit syrup goes great with these crepes! Crepes are just one of those things I always think of last. I don’t know why because they are soo much more fun than pancakes, they are so delicate and the filling choices are endless! I’ve been anxious to try something with the passion fruit growing right outside our door so I came up with a Passion Fruit Syrup for these crepes. A very delicious combination with the sweet and tang of the seeds. I’ve had this syrup before where it is blended so there are no seeds but I really enjoy the crunch of the seeds so I chose not to blend it this time. Totally a personal preference!

IMG_7806

For the Crepes:

Ingredients:

  • 2 tablespoons unsalted butter melted (plus more for frying)
  • 1 cup all-purpose flour
  • 1 ⅓ cups milk
  • 1 large egg

Directions:

Melt the butter and let cool a little.

Put the flour, milk and egg into a blender to mix well. Pour into a jug and stir in the melted butter. Otherwise, just pour the flour into a bowl, whisk in the egg and milk and finally, just before making the crêpes, the melted butter.

Heat a pan and ladle 2–3 tablespoons of batter into the pan then quickly hold it up and swirl so that the batter forms a quick, thin pancake covering the base of the pan. This will cook in a minute so flip it and cook for 30 seconds to a minute on the other side, then remove the crepe. Continue with the rest of the batter.

For the Sauce:

1/4 cup sugar

plup of 2 passion fruits

1/2 cup of water

2 tsp cornstarch

Directions:

Place the plup, sugar, and water into a pan and heat until boiled. Once the sugar is dissolved, add more water or cornstarch to get to the right consistency. Serve warm.


Read More

Another Pumpkin Wonder

This is not good… This makes me want to have a snack all day long. And usually it means bread.. uh-oh! But we did have this with our crepes and it was very yummy! This is a great holiday gift to give too! 

With just a small teeny tiny bit of pumpkin left over, I was racking my brain what I could do with it. Another issue was we were close to leaving for our South America trip so I didn’t want to make anything to big that we would have to eat up within a short time. This honey butter was the perfect solution! We were able to give the extra as a holiday gift too! This super fun recipe will make you look forward to your breakfast! or snack! or dinner! :) We had them with our crepes for breakfast, very yummy!

Pumpkin Honey Butter


Pumpkin Honey Butter:

1/2 stick (4Tbsp) of unsalted butter, softened
1 teaspoon honey
1 Tablespoon pumpkin purée
1/2 teaspoon pumpkin pie spice
1/2 teaspoon vanilla extract

Directions:

Mix all ingredients together in a bowl with a fork. Whip until well combined. You want it to be smooth so keep whipping! You could even use an electric mixer to really get it whipped up. Store in refrigerator. Spread on hot toast, a bagel, or pancakes!


Read More

Mexican Fiesta

We had company the other night and were offered the experience of “real” Mexican food. I was looking forward to see what kind of food she would come up with. It turned out to be enchiladas! Very yummy!

The Real Mexican Food!

The thing with real Mexican food is it is a lot smaller in terms of portions than what you would buy at a Mexican restaurant in the U.S. The Mexicans have no such thing as the HUGE California burrito. That’s a U.S. thing. So she was quite pleased we were taking pictures of the process so she was a great poser! Here we made chicken enchiladas and tacquitos.

Taquitos with Chicken and Cheese Real Mexican Cooking


Taquitos with Chicken and Cheese Real Mexican Cooking


Taquitos with Chicken and Cheese Real Mexican Cooking

Using corn or flour tortillas, spread shredded chicken and cheese in the middle and roll into a tight roll. Then place in a hot pan and cook until cheese is melted and tortilla is browned, this is the Mexican taquitio.

Chicken Enchiladas:

Chicken Enchiladas

For the enchiladas, place a tomato, garlic, and onion in a blender and blend until is is a thick tomato like sauce. Then place the pan in a hot saucepan and bring to a boil.

Chicken Enchiladas with cheese from Mexico

Once it is boiling, then pass a tortilla through the mixture to get it completely submerged in the sauce.

Chicken Enchiladas with cheese from Mexico

Chicken Enchiladas with cheese from Mexico

Pull it out of the sauce and place on a plate where you have room to fill with chicken. Roll into a tight ball and top with cheese.

Chicken Enchiladas with cheese from Mexico

Chicken Enchiladas with cheese from Mexico

Chicken Enchiladas with cheese from Mexico

Chicken Enchiladas with cheese from Mexico

“Real” Mexican Enchiladas

Ingredients:

For the sauce:

1-2 tomatoes

4 cloves garlic

1 small onion

For the filling:

2-3 cups shredded chicken

2 cups shredded cheese

1 cup sauteed onion

10-12 flour or corn tortillas

Directions:

In a blender combine, onion, garlic and tomato. Blend until resembles a tomato sauce. Heat a saucepan on high for 1 minute, then very slowly and carefully add the sauce to the hot pan. Bring to a boil. Once the sauce is boiling then submerge the tortillas one by one. Once the first one has passed through the sauce, then place on a plate and fill with shredded chicken and sauteed onion. Roll into a ball and top with cheese. Once all the enchiladas have been made, place in the oven until cheese on top is melted. Serve with sour cream and avocado.

Read More

Chicken Soup – Perfect for Wintertime!

Nothing like a quick dinner fix than chicken soup! This recipe is great for tweaking how you like it and adding whatever you want! I added lots of veggies this time and it was very yummy!

Chicken Soup


Chicken Soup

1 whole chicken or 2-3 cups of shredded chicken

1 cup diced carrots

1 cups diced zucchini

2 cups diced potatoes

1/2 cup onion

oregano

3-4 bay leaves

salt

pepper

chicken bouillon – if not using a bone-in chicken you will need to add 2-3 cubes

Directions:

Bring a large pot of water to boil. Place the chicken inside and boil until no longer pink. Remove the chicken from the water, and place chopped potatoes, onion, and carrots in the boiling water. This is now your chicken broth and at this point you can add some chicken bouillon if you like more flavor. Once your desired amount of chicken is removed from the bone, about 2-3 cups, add that to the boiling pot. Next, add the zucchini and spices. Simmer until veggies are tender. Enjoy with a warm piece of bread.

Read More

Pumpkin Cinnamon Roll Pancakes

Who wouldn’t want to wake up to this deliciousness!?? I thought I would just make some simple pumpkin pancakes to use up my leftover pumpkin, when I got the idea to try it out with the Cinnamon Roll pancakes that I make (and are well known and loved in our family :) It was a hit! We had to convince ourselves not to eat this whole stack! These would be a great hit with kids too!

Pumpkin Cinnamon Rolls Pancakes

Pumpkin Cinnamon Rolls Pancakes

inspired by: Piece of Home

Ingredients:

1 1/4 cups all-purpose flour
2 tablespoons sugar
2 teaspoons baking powder
1/2 teaspoon cinnamon
1/2 teaspoon ginger
1/2 teaspoon nutmeg
1/2 teaspoon salt
1 pinch clove
1 cup milk
6 tablespoons canned pumpkin puree
2 tablespoons melted butter
1 egg

Cinnamon Filling:

4 tablespoons (1/2 stick) unsalted butter, just melted (not boiling)
1/4 cup + 2 tablespoons packed light brown sugar
1/2 tablespoon ground cinnamon

Cream Cheese Glaze:

4 tablespoons (1/2 stick) unsalted butter
3-ounces cream cheese, at room temperature
1 cup powdered sugar
1/2 teaspoon vanilla extract
1/4 milk

Directions:

In a medium sized bowl, combine the four, sugar, baking powder, cinnamon, ginger, nutmeg, cloves, & salt. In a large bowl, combine the milk, pumpkin puree, butter, and egg. Slowly combine the dry ingredients to the wet ingredients while constantly stirring. Heat up two large skillets or a griddle, and place about 1/3 cup of batter per pancakes. When you see bubbles, add a swirl of the cinnamon mixture. Flip when pancakes is golden brown on the other side. Place in a warm oven until all pancakes are finished cooking. Serve with the cream cheese glaze.

Cinnamon Filling:

Melt butter and mix with sugar and cinnamon in a bowl. Once combined, pour into a small ziplock bag and snip the corner so you can squeeze the mixture out onto the pancakes.

Cream Cheese Glaze:

Mix cream cheese and butter together until well blended. Add milk and stir until well blended (sometimes I just add a few tablespoons at first in case it gets too runny). Add vanilla. Then, while constantly stirring, add powdered sugar a little at a time until it’s at the right consistency.

This was a really exciting photo shoot! These pancakes were just looking so picture perfect hot off the pan! We had fun and had a yummy breakfast. These were pretty special! A perfect way to use some of that pumpkin! Another perk, they also work well for dessert hehe :) 


Read More

Caramel Filled Pumpkin Cookies

I have been craving something pumpkin, its allowed, it’s Thanksgiving/Fall time! There is no recognition of Thanksgiving around here in Costa Rica. Sooo… we managed to find a can of pumpkin, much to my delight, and I got to work! These were what were on my mind, and they didn’t fail me! So yummy! This is really a Fall time wonder! These cookies are absolutely delicious and their aroma is to die for. I was so excited to eat these, we had them for breakfast :) Yum Yum!

Pumpkin Cookies Final

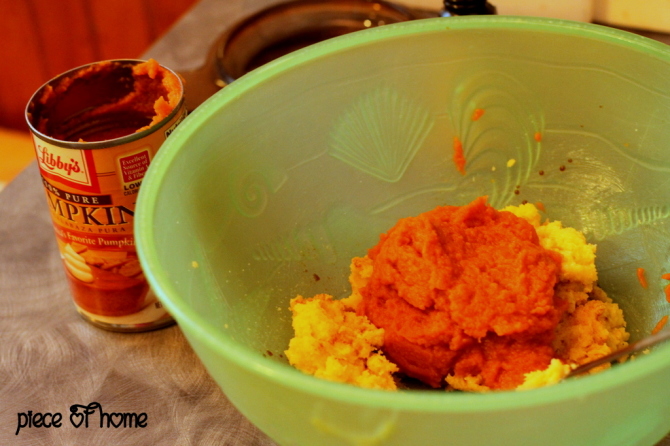
The best part, this recipe is really easy! And no eggs! First mix the butter and sugar until well blended. Then add the vanilla and pumpkin. I had so much leftover pumpkin so I”m excited to try something else with my remaining pumpkin!

Step 1

Then mix together the flour, baking soda, baking powder, cinnamon, cloves, ginger, and salt.

Step 2

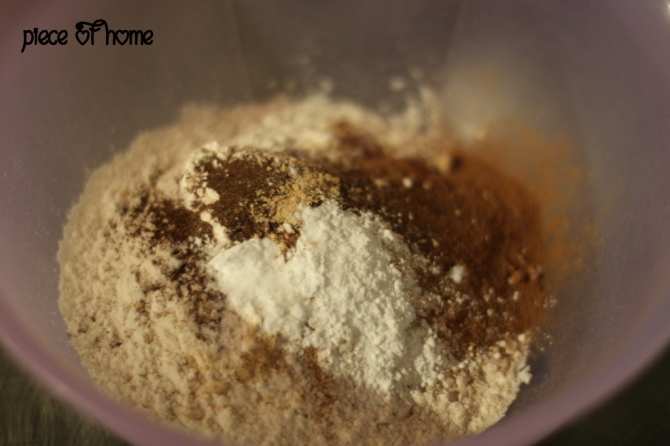
Then slowly add the flour mixture to the pumpkin mixture. And mix until well blended.

Step 3

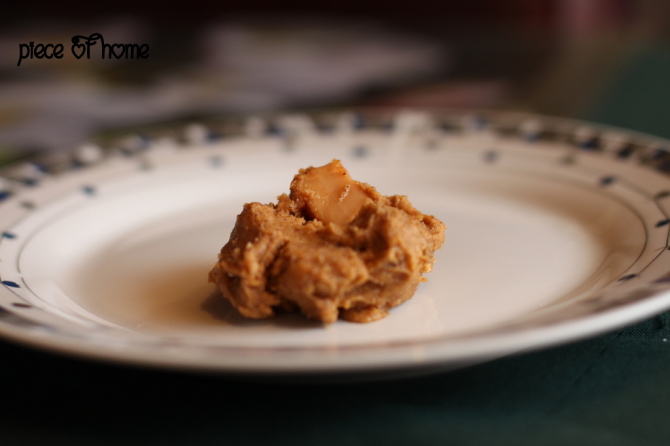
Next is the most boring part, put the dough in the refrigerator for 30 minutes  to an hour to let it firm up. Once the dough is firm, get to unwrapping those caramels! This is the fun part :)  Scoop a spoonful of dough and form the dough around the caramel.

Step 4

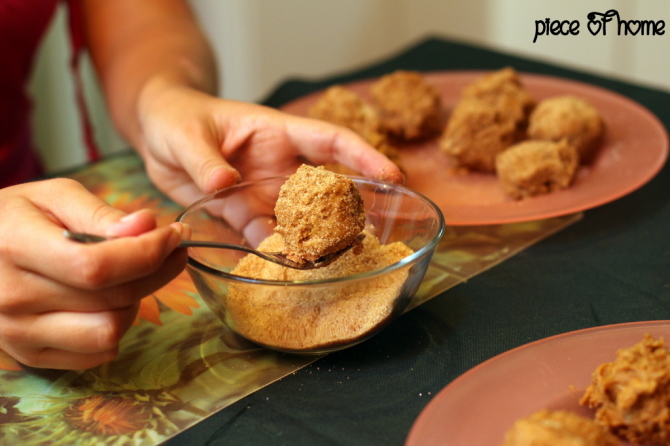
Once you have the cookies rolled into balls with the caramels in the middle then place the refrigerator for another 2 hours. When they are firm again, roll each cookies in the sugar, cinnamon mixture. At this point, my dough was still really sticky so I placed them in the refrigerator for overnight.

Step 5

So when morning came around, guess what we were having for breakfast!? We really did! Haha, I was so anxious to try them and who says cookies aren’t allowed at breakfast? My hubby sure didn’t complain :) While these babies were in the oven, I was so excited at the this point! I felt like I missed out on Thanksgiving so this was totally making up for it :)

Step 6

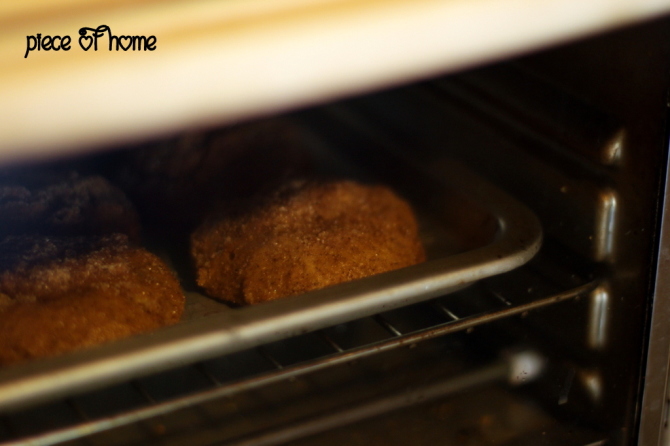
Yummy, Yum Yum! Delicious smells going on in our house right now!

Caramel Pumpkin Cookies

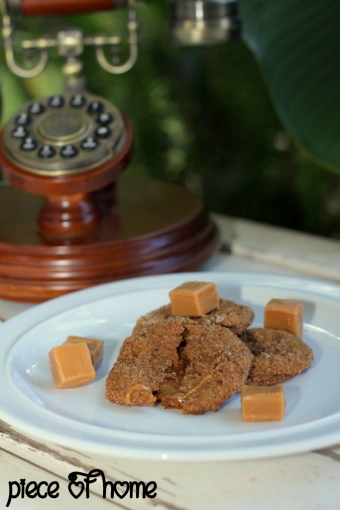
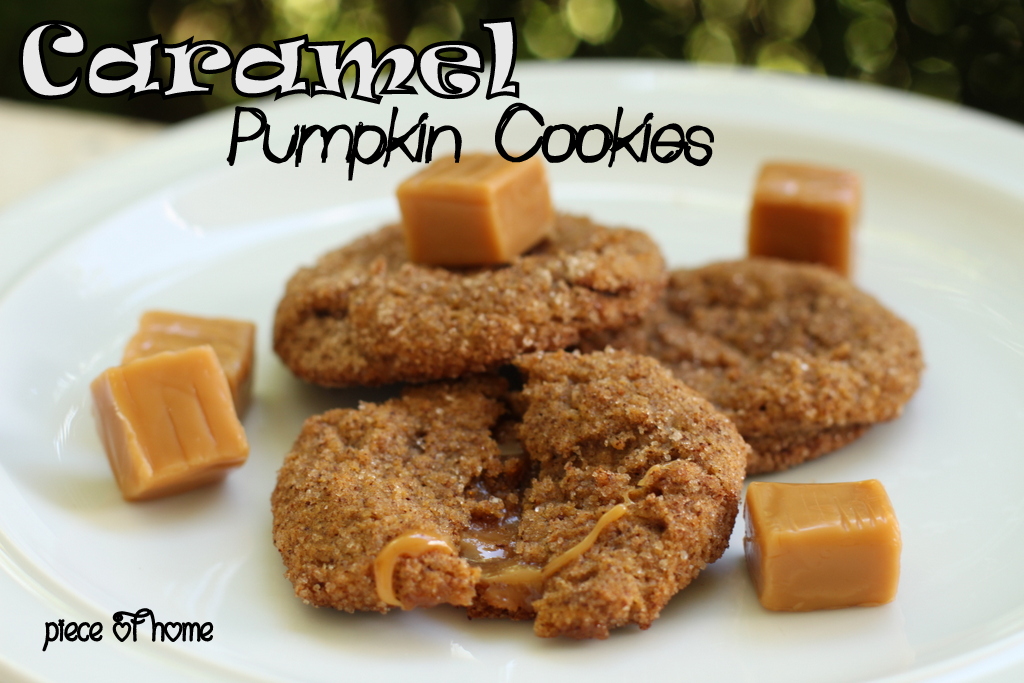
And this is the finished product! So in love! Perhaps a highlight of my week! (Also because we had fun taking the pics afterwards :)

Caramel Filled Pumpkin Cookies

inspired by: Cinnamon Spice and Everything Nice

Ingredients:

1/2 cup unsalted butter, room temperature

1 1/2 cups granulated sugar, divided

1/3 cup pumpkin puree

1/2 teaspoon vanilla extract

1  1/2 cups all-purpose flour

2 tablespoons + 1/2 teaspoon ground cinnamon, divided

1/8 teaspoon ground cloves

1/8 teaspoon ground ginger

1/2 teaspoon baking soda

1/4 teaspoon baking powder

1/4 teaspoon salt

1 (14 ounce) bag Kraft Caramels

Directions:

  • Line 2 large cookie sheets parchment paper. (the caramels try to seep out the bottom sometimes)
  • In a large mixing bowl beat the butter and 1 cup sugar together on medium speed 2 minutes. Add the pumpkin and vanilla beat on low 2 more minutes.
  • In a small bowl whisk together the flour, 1/2 teaspoon cinnamon, cloves, ginger, baking soda, baking powder and salt. Add to the sugar mixture and beat on low just until combined. Refrigerate 30 minutes to an hour.
  • After 30 minutes/1 hour scoop up rounded tablespoons of the dough, stick a caramel in the center and roll into a ball. Set on one of the parchment lined cookie sheets.  Repeat until all the cookie dough is used up. Refrigerate at least 2 hours or overnight.
  • When ready to bake, preheat oven to 350 degrees F. Whisk the remaining 1/2 cup sugar with 2 tablespoons cinnamon in a wide, shallow bowl.
  • Working in batches, roll the cookies in the cinnamon sugar and bake 2 inches apart for 14 minutes. Refrigerate the unbaked cookies in between batches.
  • Allow the cookies to cool completely on the baking sheets. Store in tightly covered containers up to a week.

Enjoy! This is a fall time wonder!

Read More

Coffee Wimp

Ok, ok, I’ll admit, I’m a coffee wimp. I don’t drink coffee very often because I really only enjoy it when there is creamer to go with it. Makes me miss my brother-in-law because he always had a good stash of creamer in the fridge :) So… one of my close friends suggested I should try and make my own creamer. Well it’s nothing like store bought but pretty delicious. I’ve made French Vanilla and have also added some cinnamon and Allspice :) It’s pretty yummy!

The part I am loving about this recipe is now I can enjoy some Iced Coffee too :) For me, it is so refreshing to have a fun drink like this when I’m working away on the computer. Plus, since we are living in Costa Rica, who is known for their coffee, I better be drinking it, right? Try it out! There are so many ways to experiment too with different flavors!


Coffee Creamer


Homemade Coffee Creamer

inspired by: Mrs. Happy Homemaker

Ingredients:

1 3/4 cups of milk or heavy cream

1 (14oz) can of sweetened condensed milk

Directions:

Place the cream and sweetened condensed milk a container with a lid (I usually use a large water bottle or mason jar) and shake for 2 minutes or more until well mixed.

Now for the fun part:

Additions for different flavors:

– vanilla

– chocolate syrup

– almond extract

– cinnamon

– caramel syrup

– raspberry syrup

I usually just add a teaspoon for the extracts and a tablespoon for the syrups until it is to my liking. Enjoy!

Read More

Passion Fruit Lovin’

This my friends is the passion fruit flower. It is absolutely amazing! This beautiful vine creates these deep purple flowers. The flowers then grow the fruit from the middle and then die away when the  fruit starts growing. It is by far the most amazing flower I have ever seen! Credit to my husband for these amazing pictures! These pictures take my breath away every time!


Passion 1024

Passion 1024_2

Passion 1024_3

Passion 1024_4

Passion Fruit

Read More

Yogurt Frenzy

A creamy and rich natural choice of yogurt that is cheaper and healthier!

yogurt size 1024

We eat so much yogurt, sometimes its not even funny! Well here in Costa Rica we are trying to keep our tummies happy by keeping those good bacteria in our systems! So… we decided to try making our own since we practically buy the store out every time we go. Plus, making yogurt homemade means not as much sugar that you would normally find in regular store bought yogurt. It’s a win, win! :)

I am not much of a natural yogurt fan, but having loads of it after making a batch actually opens up huge creativity doors to making new flavors! I’ve added peach, strawberry jam, vanilla, etc.. It’s so fun and delicious!

Ok, so are you ready for the recipe?? It’s so hard, I don’t think you’ll be able to do it… (you’ll be surprised how easy this is!!)

Homemade Yogurt Print Button 50

Recipe Card Border 2

Ingredients:

– 2 liters of milk

– 2 teaspoons of natural yogurt (store bought, this is the mother, also save some from this batch to use as your mother next time)

– 1/4 cup of powdered milk

Directions:

Pour milk into a large pot and add the powdered milk. Stir until it is mixed in. Heat milk in a saucepan until temperature rises to 180 degrees.  Check out our digital thermometer we use!  It is Important not to go over 180 degrees, try to get it as exact as possible. Once milk reaches a temp of 180, hold at this temperature for 5 minutes. Then remove from heat and let milk cool until it reaches 120 degrees.

At this point you can remove about a cup of warm milk from the pot and add in the teaspoon of yogurt. (This just helps it get mixed in better. Just gently stir, you want to see chunks of the yogurt in the milk – incorporating not mixing. Then pour the cup of milk with mixed in yogurt back into the rest of the milk mixture.

Pour into glass containers for storage. Place the milk in a slightly warm (not hot) place for 10-12  hours. We hold our yogurt at about 105-110 degrees for the duration of the incubation. Refrigerate when done. Yummy!

*Tips:

We make the yogurt after dinner usually so it can just sit overnight and you don’t have to worry about it. You can place it in a oven at the lowest temp possible. We place ours in an ice chest with a pot of boiling water to keep it warm. Also, I usually double/triple the recipe because we go through it fast. Remember to keep a few teaspoon of your batch so you can use this as your “mother yogurt” for your following batch! If you do this, you will always have yogurt!

** If you like your yogurt Greek style, then before putting the yogurt into the refrigerator, strain the yogurt for 5-10 minutes through a cheesecloth. Doing this extracts the whey, giving you a thicker, creamier yogurt. This is always my preference and its so yummy!

Add-in suggestions:

Coconut & Pineapple
Jam (flavor of your choice – I like strawberry)
Peaches
Vanilla Flavoring (Starbucks has a yummy vanilla syrup)
Berries (strawberries, blueberries, blackberries)
Jello powder? (my husband thinks this is the best idea ever :)
Granola Check out this recipe
Strawberry & Honey – 1/2 cup yogurt + 4 chopped strawberries + 1 tablespoon honey
Lemon Cheesecake – 1/2 cup yogurt + 2 tablespoons lemon curd+ 1 crushed Graham cracker
Mixed Berry – 1/2 cup yogurt + 4 chopped strawberries + 6 chopped raspberries + 6 chopped blackberries
Cinnamon Apple – 1/2 cup yogurt + 1/2 diced green apple + 1/4 teaspoon ground cinnamon
Key Lime Pie – 1/2 cup yogurt + juice of 1 lime + 1 crushed Graham cracker
Apple & Raisin – 1/2 cup yogurt + 1/2 diced green apple + 2 tablespoons raisins
Chocolate Peanut Butter Cup – 1/2 cup yogurt + 1 tablespoon peanut butter + 1 tablespoon cocoa powder + 1 tablespoon honey + 1 teaspoon milk chocolate chips
Chocolate Banana – 1/2 cup yogurt + 1 tablespoon cocoa powder + 1 tablespoon honey + 1/2 diced banana
Strawberry Shortcake – 1/2 cup yogurt + 4 chopped strawberries + 1 crushed Graham cracker
Peaches & Cream – 1/2 cup yogurt + 1 chopped peach
Piña Colada – 1/2 cup yogurt + 2 pineapple rings diced + 1 tablespoon grated coconut
Chocolate Pomegranate – 1/1 cup yogurt + seeds from 1/2 pomegranate + 1 tablespoon dark chocolate chips
Pumpkin Pie – 1/2 cup yogurt + 1/4 cup pumpkin puree + 1/2 teaspoon pumpkin spice
Chunky Monkey – 1/2 cup yogurt + 1/2 chopped banana + 1 tablespoon Nutella + 1 tablespoon peanut butter + 1 teaspoon milk chocolate chips
Tropical – 1/2 cup yogurt + 1/2 chopped kiwi + 1/2 chopped mango + 2 pineapple rings diced
Cinnamon Bun – 1/2 cup yogurt + 1/2 teaspoon ground cinnamon + 1 tablespoon honey

A few add in suggestions {adapted from Pink Recipe Box}

It has been really fun learning to make yogurt and I hope you will enjoy the process as well! It’s great for kids too! They love checking on the yogurt to see how it’s doing! Someday we would love to get a yogurt maker but for now this is just as fun!

Let me know how your yogurt turns out!

Alyssa Signature

Read More