Author Archives: Alyssa

Roasted Garlic Spinach Pizza

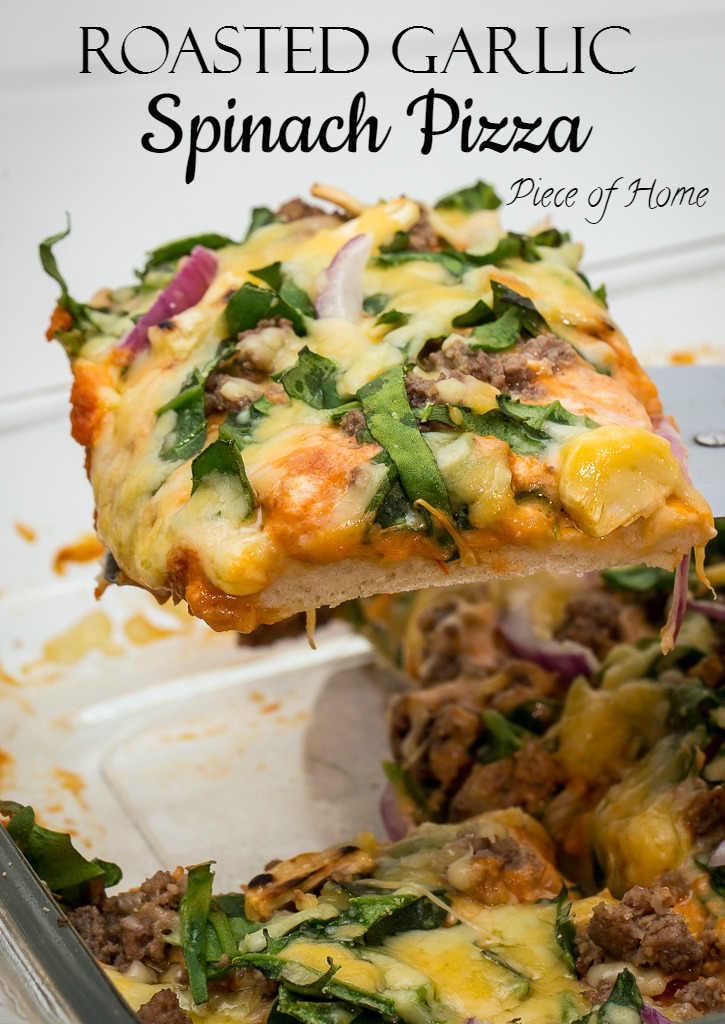
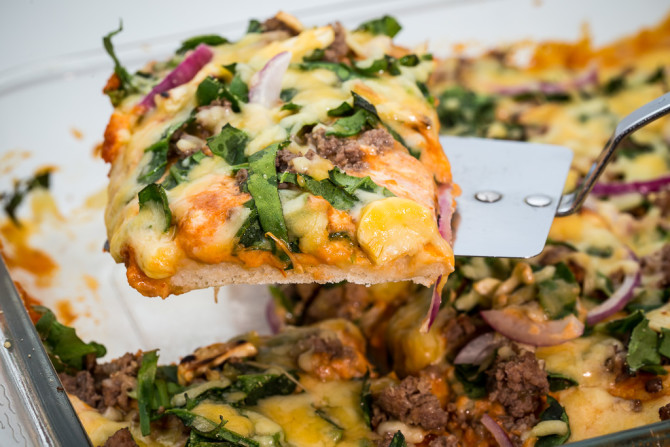
Specialty pizza at it’s best! Topped with spinach and garlic, this pizza packs a punch! 

Roasted Garlic Spinach Pizza Piece of Home


I’ve never considered myself spontaneous.

I like to plan. I love to have a plan, a list, and to be organized. It just makes things go so much smoother! I’ve come to realize lately though that sometimes my “organized plans” can ruin the happiness of spontaneity. Now to clarify…

I’ve found that when I have a plan but am willing to let it go in order to be spontaneous, wonderful things happen! However, when I’m so stuck on my plan going as I had in mind, I can’t branch away from it and it’s more like a huge sore thumb! Now I’m not saying to not have a plan, no not at all. Just give into those spontaneous moments and enjoy what’s in front of us. Like this Roasted Garlic Spinach Pizza. Now that is something to be enjoyed!

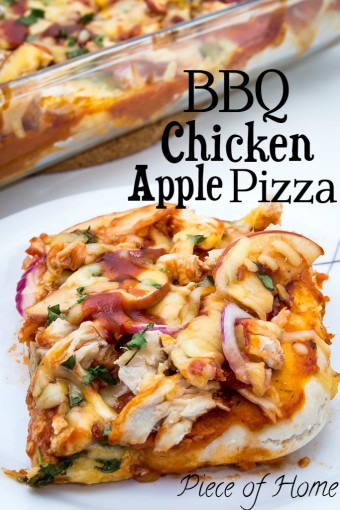
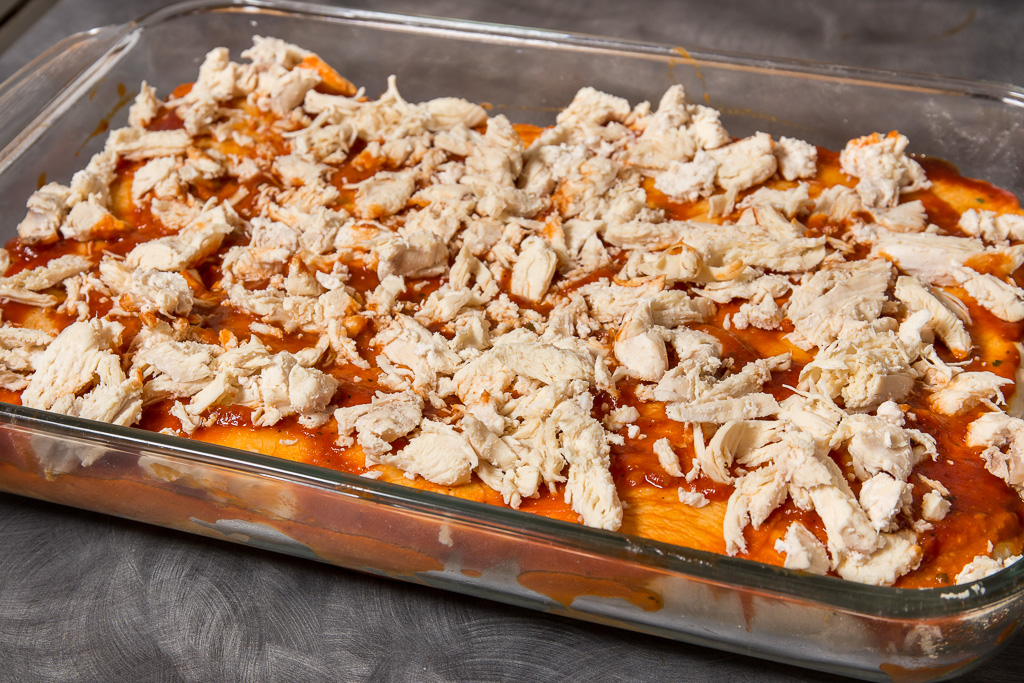
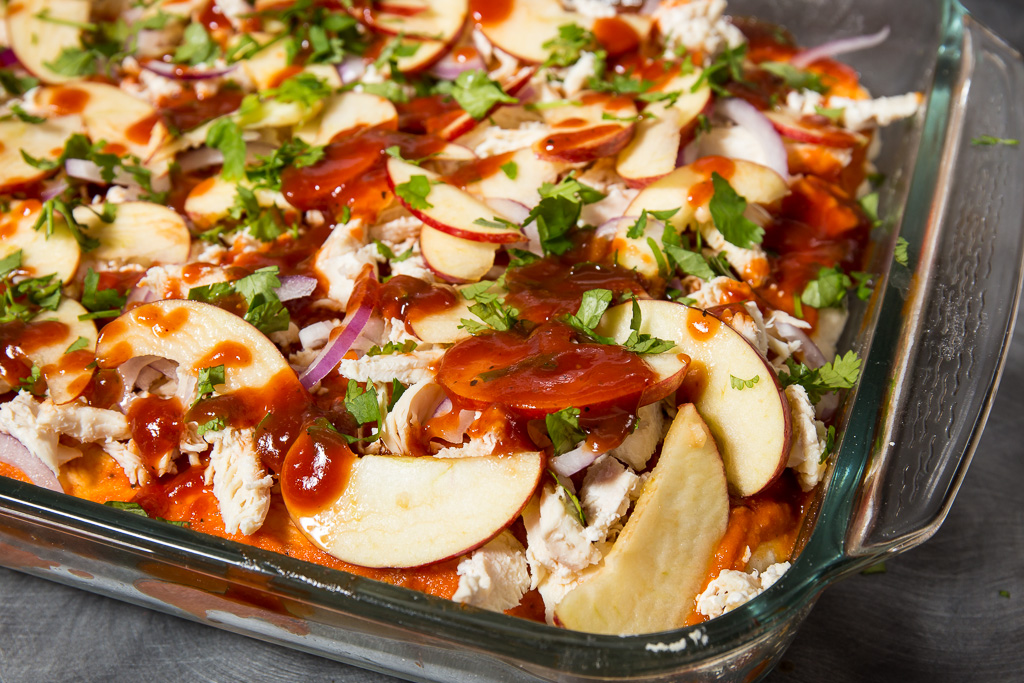
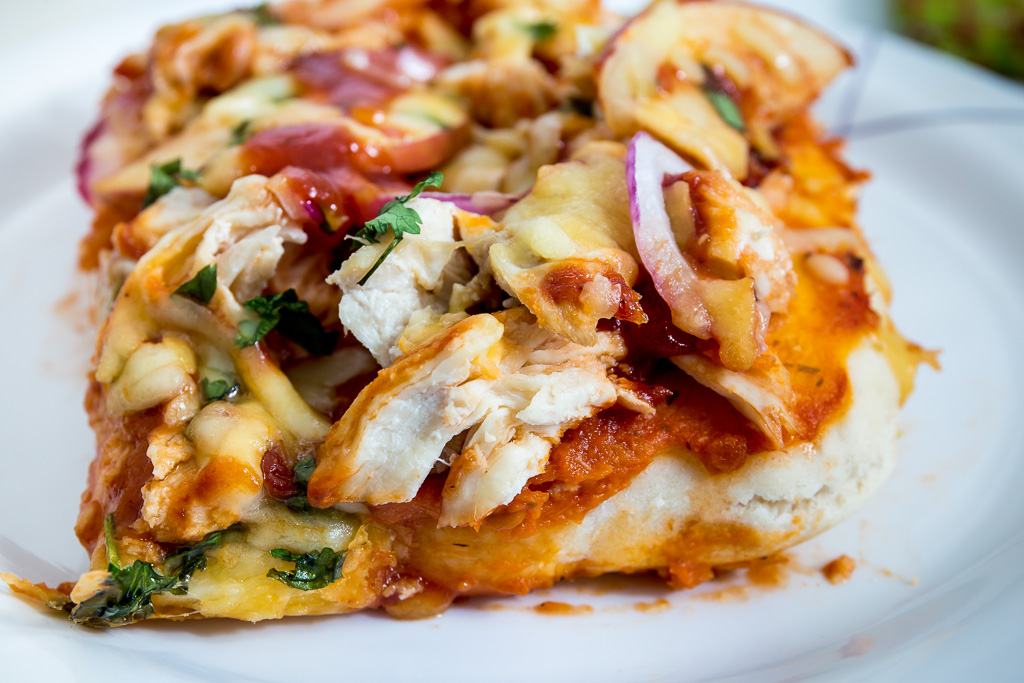
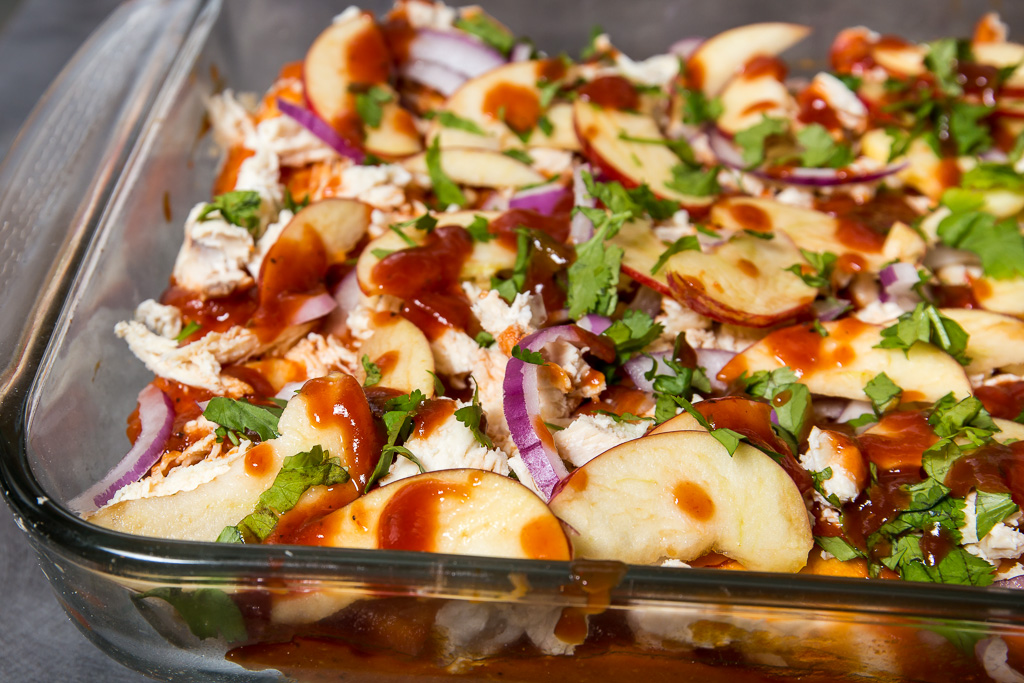
This past week we had a houseful of guests. Now what better to serve to a large group of people than pizza on a Friday night! It was a hit and between the Roasted Garlic Spinach Pizza and the Chicken Apple BBQ, this one won hands down! It’s gotta be the RANCH!! All the Ranch fans will openly admit their infatuation with that stuff. It’s that good.

Midway through my week of guests, I had a meal planned and because of a change in plans, I had to change my meal quickly. Now to some OCD planners and organizers (kinda like me…) that can be super stressful. However, I took it in stride and the meal came out so good! So good, I didn’t even get to take pictures before it was all gone. By the way, Chicken Pot Pie is a GREAT recipe to make with a large group of people. Tummies happy and home comfort given. Happy Guests! Yay for Spontaneity!

Roasted Garlic Spinach Pizza Layout

I think I mentioned already that this pizza is hiding some Ranch under all those greens. Yes, you heard me, Ranch! That makes all the spinach A-ok!

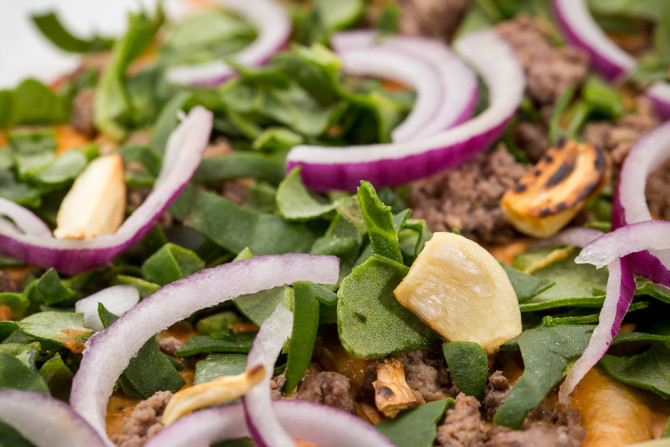
Once you add the roasted garlic and red onion, there is no hiding the beauty of this pizza! I learned something new with this pizza. I have to share it with you. Did you know that roasted garlic is a bit spicy? I had no idea and popped a big chunk in my mouth and had a HUGE surprise. Just a note for those of you who don’t want such a garlic overload, you can cut those cloves a bit smaller before roasting. Otherwise, enjoy the zip!

Roasted Garlic Spinach Pizza with Onion

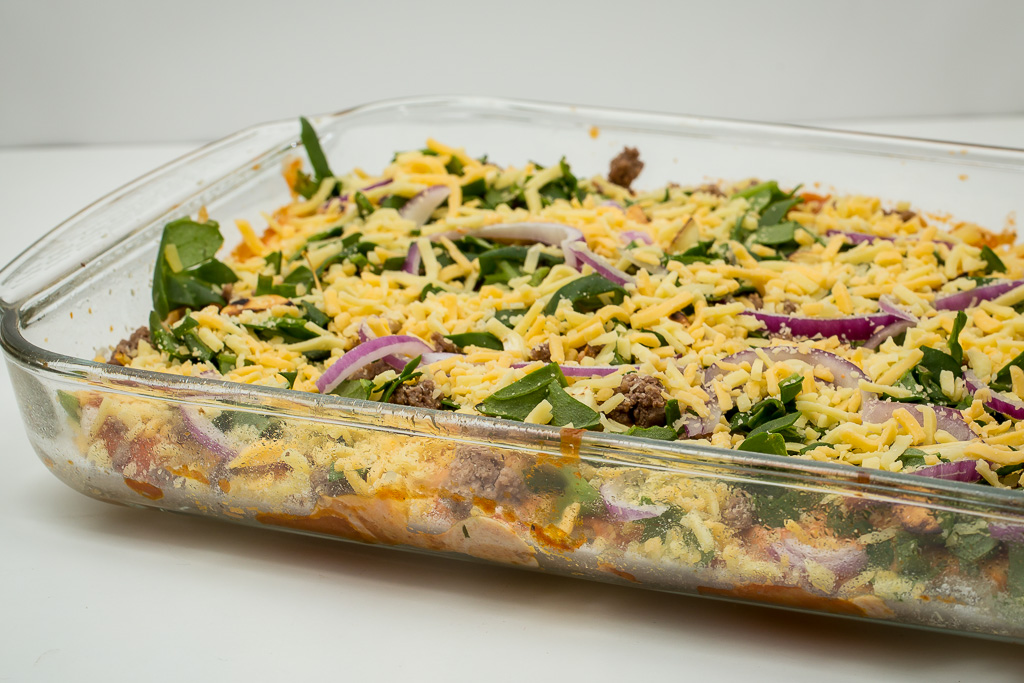
The cheese just adds the finishing touch of color and flavor. It’s the sure sign that this pizza is ready for the oven! Grab your friends and have a grubbin’ good time!

Roasted Garlic Spinach Pizza with Cheese

Roasted Garlic Spinach Pizza Print Button 50

Recipe Card Border 2

Ingredients:

1 ball prepared pizza dough, homemade or store bought
1 lb. ground beef, cooked, crumbled
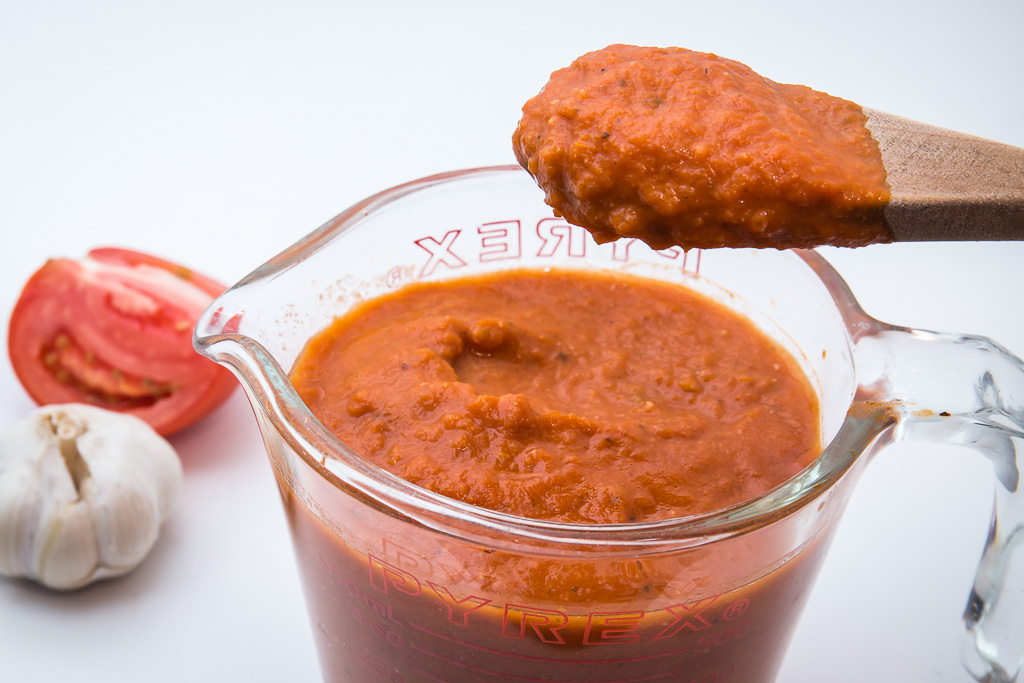
1/2 cup pizza sauce, homemade or store bought
1/4 cup Ranch
1 cup spinach, shredded
1/4 cup red onion, sliced
1/2 bulb of garlic, cut in halves, roasted
2 cups cheese

Directions:

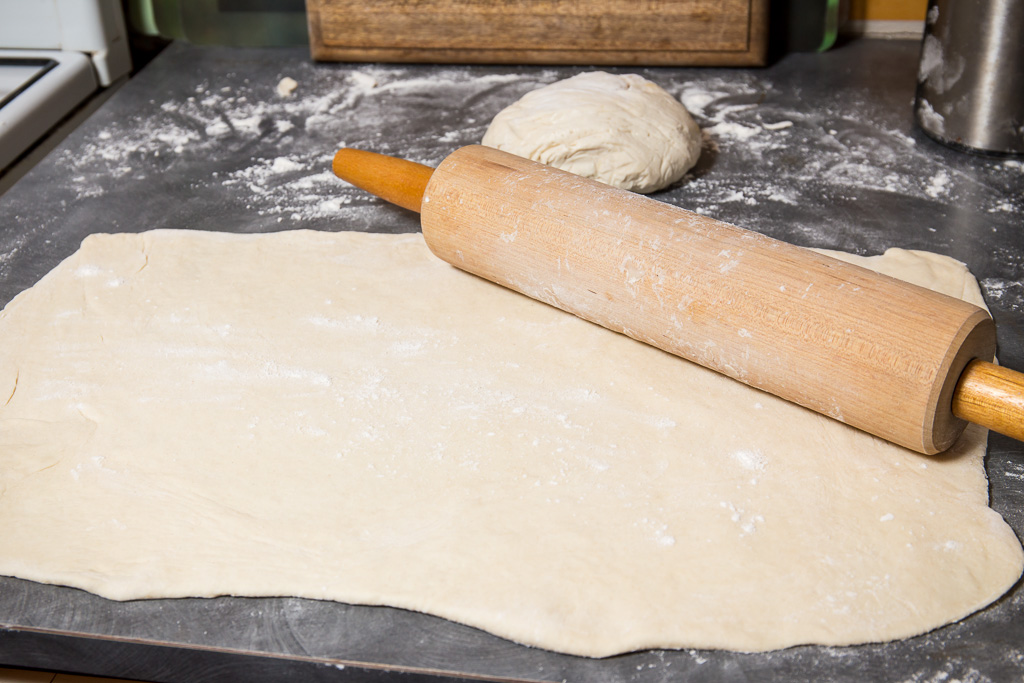
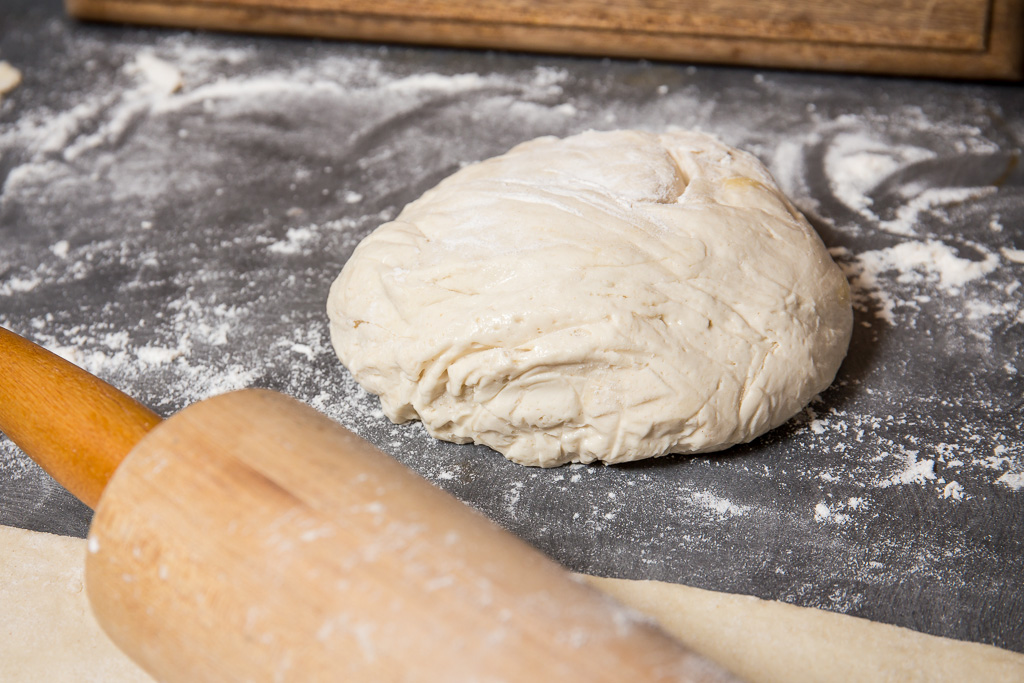
1. Roll out your pizza dough into a 10-inch circle or 9×13 rectangle.

2. In a large saucepan, brown the ground beef until no longer pink. Drain off all the juices and crumb the meat with a fork.

3. Peel the cloves of about 1/2 a garlic bulb. Cut each clove in half longways and place in a medium saucepan on medium heat. Stir until the sides have browned. Careful not to burn them!

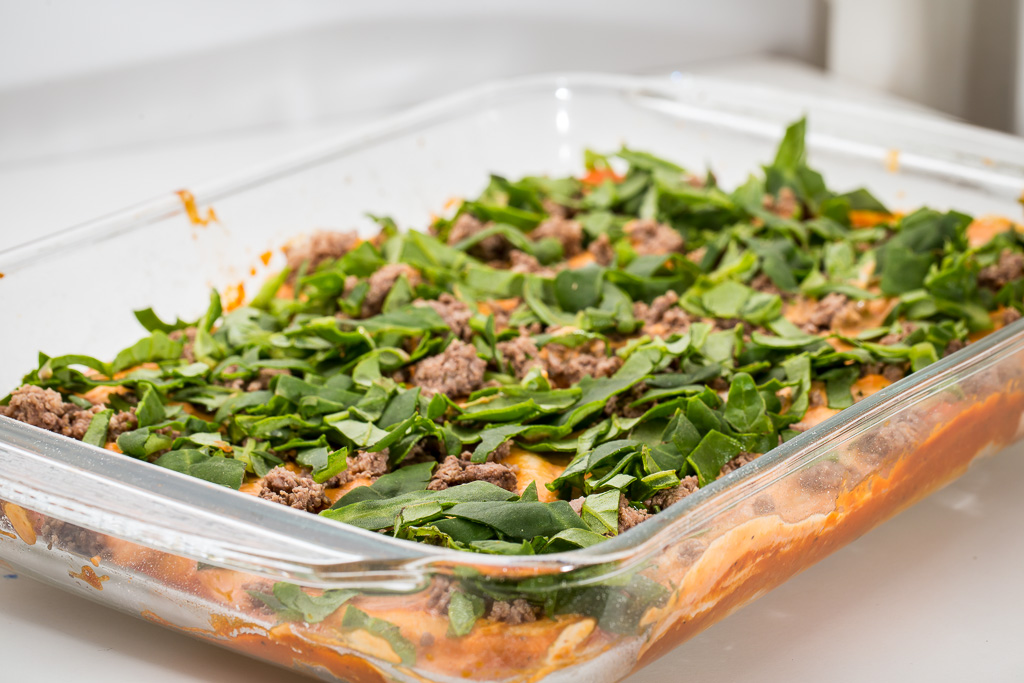
4. On the prepared pizza dough, spread the pizza sauce and ranch. Sprinkle the ground beef evenly over the dough. Top with shredded spinach and sliced onions. Add the roasted garlic.

5. Top with cheese and bake at 400 degrees F. about 15-20 minutes until cheese has melted and crust is no longer doughy.

Enjoy!

Roasted Garlic Spinach Pizza Pan

If you liked this recipe, don’t forget to follow me on social media for many more yummy recipes!

Facebook Teal 120 Twitter Teal 120 Pinterest teal 120

Read More

Camping Art

Camping Decor piece of Home

I must be a camper because I just absolutely love this cute camping art. Anything camping and I’m all ears! It’s just so fun! Given that the Indian design, ti-pi design is very popular, I was bound to fall in love with these!

Not sure what to do for the weekend? Grab your little ones and set out on an adventure! It doesn’t have to be far! A fort in your living room is enough to make them smile! Get in the camping spirit with summer just around the corner!

Click HERE to print the Happy Little Campers

Happy Little Campers

Click HERE to print the Adventurers

Let's Be Adventurers

Have fun with two adorable prints! Make sure to tag #piecesofhome if you use them in your decor! I’d love to see!

Read More

German Chocolate Cake

When it comes to chocolate cake, it’s double stacked or nothing!  

The Best Chocolate Cake Piece of Home White
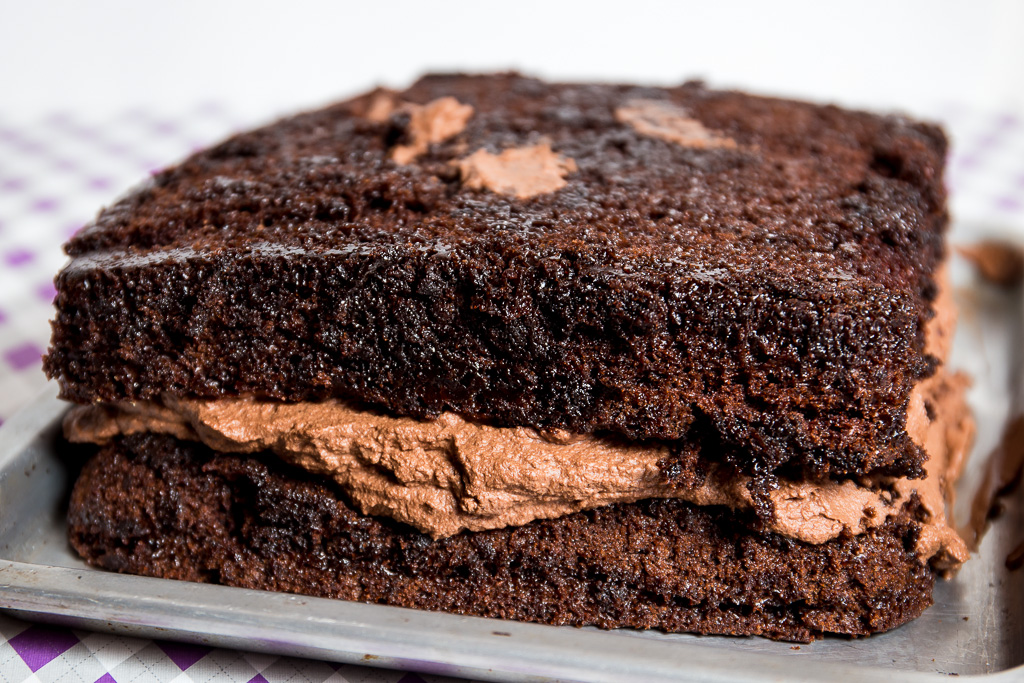
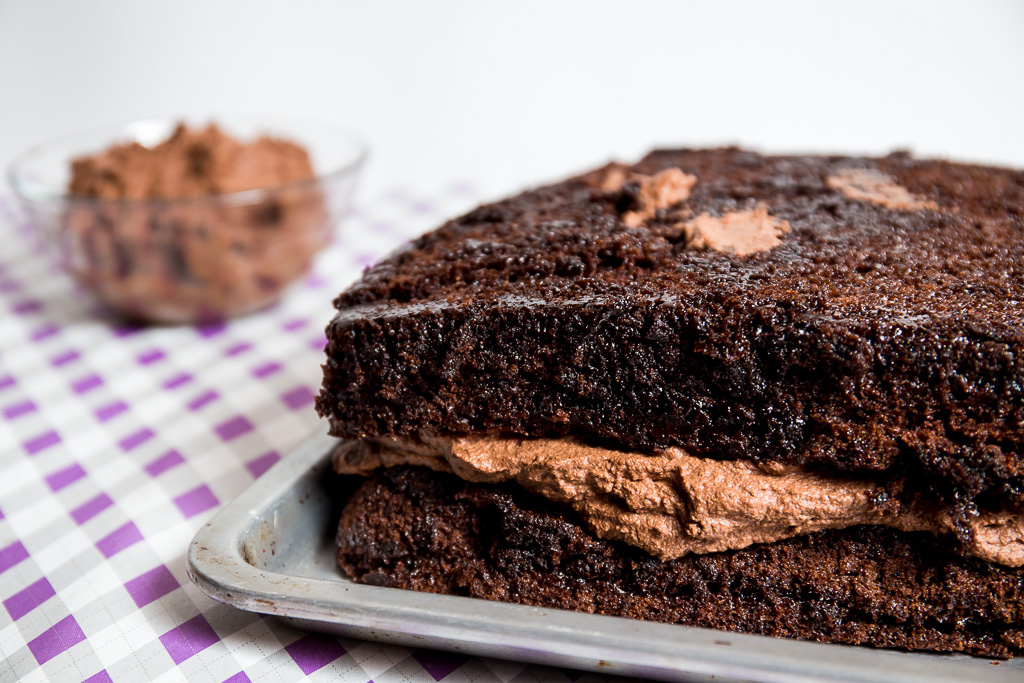
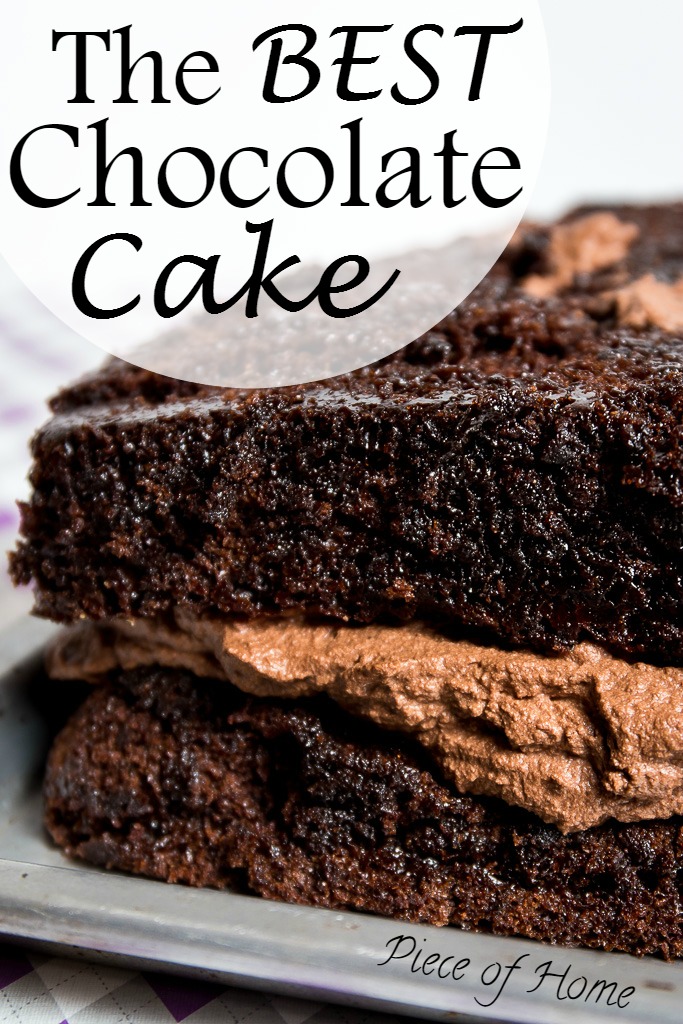
When it comes to chocolate cake, there are a million different types of cakes you can make! All you need is a never-let-me down cake base that works perfectly for all those cakes you want to try.

This is it!

Such an easy cake recipe that’s super moist and overflowing with chocolate flavor. It’s smell alone will make you forget the original cake idea you had in mind. And make you want to eat it…now…

Of course a chocolate cake is only perfected when stacked with some kind of delicious filling in the middle. Because who doesn’t like a good yummy surprise when they cut into their cake for the first bite. I know I do!

For all you German Chocolate Cake lovers out there, this is a GREAT chocolate cake to pair with that delicious coconut frosting! At least I can vouch for it! And so can my family! We all love that Coconut Frosting!

Chocolate Cake - Naked

The BEST German Chocolate Cake Print Button 50

Recipe Card Border 2

Ingredients:

1 and 3/4 cups flour
2 cups sugar
3/4 cup cocoa powder (sifted)
1 and 1/2 tsp baking powder
1 and 1/2 tsp baking soda
1 teaspoon salt
2 eggs
1 cup milk
1/2 cup vegetable oil
2 tsp vanilla extract
1 cup boiling water
Chocolate Filling
Coconut Frosting (recipe below)

Directions:

1. Preheat oven to 350 degrees F.

2. Prepare two cake pans (round or square) by greasing and lightly flouring them. This helps ensure a clean removal from the pans.

3. In a large mixing bowl, stir together the cocoa, baking powder, baking soda, and salt.

4. Add the eggs, milk, oil, and vanilla and stir on medium speed about 2 minutes.

5. Add the boiling water to the batter. It will be very thin at this point. Pour the batter into your prepared baking pans.

6. Bake for about 35 minutes or until a toothpick comes out clean from the center of the cake. Allow 10 minutes for the cakes to cool in the pan. Remove from pans onto wire rack and let them cool completely.

7. When the cakes have cooled, cut each cake evenly in half using a sharp serrated knife. You will end up with four thin cake pieces.

8. Arrange the first cake layer on the serving plate. Cover with chocolate filling. Repeat with the remaining layers adding a generous layer of chocolate filling between each layer.

9. If any extra filling remains reserve for decorating the top of the cake later. Place in the refrigerator for about 30 minutes.

10. Using a spatula or knife spread the coconut frosting evenly over the top and sides of the cake. Make sure the frosting is completely cooled before beginning. Decorate the cake with the remaining chocolate filling by creating dollops with a decorating tip along the top edge of the cake.

Refrigerate until ready to serve!

Chocolate Cake with Filling

And now for the greatest coconut frosting! The one that makes your chocolate cake into the famous German Chocolate Cake! Ta-da!

Oh heavens, how I love this stuff! Sticky, sweet, with the perfect crunch!

German Chocolate Cake Frosting Piece of Home

Coconut Frosting Print Button 50

Recipe Card Border 2

Ingredients:

1/2 cup sugar
1/4 cup brown sugar
1/2 cup butter
1 tsp vanilla
3/4 cup evaporated milk
1 cup Pecans, chopped
2 cups shredded coconut

Directions:

1. In a medium saucepan, mix together the sugars, butter, vanilla, and evaporated milk. Bring to a low boil over medium heat. Stir constantly for about 5 minutes or until the mixture begins to thicken slightly.

2. Remove from heat and stir in chopped pecans and coconut.

3. Allow to cool completely then refrigerate until ready to use. It is easier to frost the cake after the frosting has been refrigerated then left to thaw for a few minutes.

{Adapted from Tastes Better From Scratch}

Enjoy! This is a great way to celebrate a birthday!

Now you might be wondering where the final picture is, of the cake all frosted and looking beautiful. I’m wondering too! If you read about the crazy quick time we had to make this cake in my Chocolate Filling post then you will realize I really didn’t have time! We frosted the cake when we arrived to our friends house and even then it was a quick-get-it-together type of thing because it was a surprise. So bad lighting, impromptu peanut butter “icing” for letters = bad picture. But it was a delicious cake! Everyone loved it!! And for being impromptu in a foreign country, I’ll have to say it was great!

Ok, ok, I’ll give you a small little peak at what it turned out like. Not pretty but hey. When the crowd’s happy, that’s all that matters! Next time I make this, it’s getting a proper photo sesh. It definitely deserves it!

German Chocolate Cake Final

Worry-Free Chocolate Filling Piece of Home


Read More

Chocolate Filling

Quick, smooth, delicious, and oh so chocolaty!

Worry-Free Chocolate Filling Piece of Home

I’ve been anxiously waiting to share this post with you all. I have no patience when it comes to all things chocolate. I need to share it with you now! And chocolate frosting just falls into one of those categories that I just really, really love. I’m not what some people would call a chocolate fanatic. I just know how to truly appreciate something smooth and packed with chocolate. Fanatic much?

Introducing the BEST worry-free, ready in no time, chocolate filling!

There are always those moments when making a cake when I decide “oh actually, I want to triple stack it, 3 flavors, multiple frostings, the whole she-bang.” Then I have to reign myself in again and remind myself that although I really enjoy making beautiful cakes I must focus on what is possible at the moment.

To set the moment..

This was one of those moments where an hour before we were leaving to visit some friends I remembered someone had a birthday that day. Quick, lets make a German Chocolate Cake. Why do I do this to myself!?

Chocolate Filling Bowl

Luckily, this amazing worry-free frosting came to my help! Quick, smooth, delicious, and oh so chocolaty. Just perfect! I may have been stingy with the spoon licking at the end. Who’s to blame!? Now, onto this goodness!

Worry-Free Chocolate Filling Print Button 50

Recipe Card Border 2

Ingredients:

1/2 cup hot water
4 Tbsp cocoa powder
1 1/2 cups semi-sweet chocolate chips
2 cups heavy cream
3 Tbsp sugar

Directions:

1. Dissolve the cocoa powder in the hot water stirring frequently.

2. In the microwave or double boiler, melt the chocolate chips, just until smooth. If using the microwave, stir every 30 seconds until smooth.

3. Add the hot cocoa mixture to the melted chocolate chips and stir well to combine.

4. In a separate bowl, beat the heavy cream and sugar until it becomes stiff. It should be thick and not slide off your spoon.

5. Add the whipped cream mixture to the melted chocolate and mix until well combined.

6. Refrigerate until ready to use.

Alyssa Signature

Chocolate Cake - Naked

Read More

Friday Favorites #10

Happy Friday ya’ll! This week flew by again just like all do! We were on a beach vacation last week celebrating our 6th Wedding Anniversary so by the time we got back to our schedule this week, it was gone!

We had a great time, much needed beach time!

Here are some of my absolute faves this week! It must be getting warm because all these salads are sounding so amazing!

Berry Pistachio Spinach Salad with Berry Vinaigrette from Le Creme de la Crumb

This salad dressing looks fabulous! I’m so into spinach right now and would totally go for this salad. If only I had some of these berries… soon though!

berry-lovers-salad-8

Hand Painted Glasses from Design

These designs are so simple and yet so stunning!

colored vases

Cream Cheese Swirled Carrot Cake Bars from Le Creme de la Crumb

My husband would drool over these! Carrots are a huge hit in our house! Not to mention carrot desserts!

cream-cheese-carrot-cake-bars-4

Outdoor Coffee Table by RemodelAholic

What a simple multiple use way to make a patio. Love the colors!

diy-metal-bucket-patio-table

Blackberry Bacon Blue Cheese Salad from Lemon Tree Dwelling

Berries + Bacon!? Yes please!

Blackberry-Salad-3

Homemade Falafel with Tahini Sauce from Just a Taste

Love Mediterranean food! Falafel is such a yummy lunch! Trying this soon!

Falafels

DIY IPad Holder from Mamie Janes

So creative and just darn cute!

ipad holder

DIY Layered Burlap Monogram from Home Talk

Adorable! I have to perfect my bow tying for it to look that good.

letter decor

Mason Jar Teas from Swanky Decors

This looks like a perfect summer pool party refreshment!

Mason-Jar-Tea

Pallet Wood Arrows from Polka Dot Poplars

This would look adorable in a girl’s room!

SONY DSC

Peach & Blueberry Greek Yogurt Cake from Julias Album

So is this breakfast or dessert? Both?

peach cobbler

Quinoa Enchilada Casserole from Damn Delicious

Another great way to use Quinoa! Trying soon!

quinoa enchilada

Spring Salad with Strawberry Lemon Basil Dressing from Oh She Glows

The Lemon Basil Dressing sounds so refreshing!

Strawberry Salad

Sunflowers on a Bike from HeartBook

This picture reminds me of my grandma who loves sunflowers! What a beautiful picture!

sunflowers

Ultimate Chocolate Chip Cookie Layer Cake from Life, Love, and Sugar

This is truly a Y.O.L.O Dessert! Wow…

The_Ultimate_Chocolate_Chip_Cookie_Cake3

Read More

Easy Homemade Pizza Crust

The perfect crust that brings a smile to everyone’s faces. After all, everyone needs a fabulous crust to their fabulous pizza! 

Easy Homemade Pizza Crust Piece of Home

The best way to have bake amazing pizzas in your home is to of course have some amazing pizza crust.

The secret to an incredible pizza is in the crust. Fabulous crust = To.Die.For Pizza

Pretty simple huh?

Homemade Pizza Dough - Rolled

Rest assured, this pizza crust is simple. We need fabulous crust so we need a quick recipe that will give us that! With a little olive oil and garlic salt, this is truly the BEST pizza crust recipe out there!

This dough is very soft and easy to work with. Make double if you want so you have have extras ready to go in the freezer! Then you can have pizza all week long if you want! Don’t be intimidated by this recipe. It is after all, easy homemade pizza crust!

Homemade Pizza Dough Corner

Easy Homemade Pizza Crust Print Button 50

Recipe Card Border 2

Ingredients:

1 and 1/2 cups warm water
1 tablespoon instant or active dry yeast
1 tablespoon sugar
1 teaspoon salt
1 tablespoon olive oil
3 and 1/2 cups all-purpose flour, plus more as needed
Olive oil or cooking spray
Garlic salt
cornmeal

Directions:

1. In a large mixing bowl, stir in water, sugar and yeast. Let sit 5-10 minutes or until the yeast is bubbly and dissolved.

2. Add olive oil, salt, and 1 ½ cups flour and mix until combined. Gradually mix in 2 more cups of flour until dough starts to form. If your dough is too sticky, add 1 more tablespoon of flour at a time (up to 1/4 cup) until dough is not as sticky. Knead the dough for 5 minutes by hand or in your mixer.

3. Shape the dough into a ball and place back into your large mixing bowl that has been coated lightly with olive oil. Turn dough over to coat with oil. Cover tightly with plastic wrap and allow to rise until doubled in size, 1-2 hours.

4. Preheat your pizza stone or baking sheet in middle rack of your oven for 30-60 minutes at 475 degrees F.

5. Once the dough has doubled, remove from bowl and knead a few times. Divide the dough into two equal parts and cover for 15 minutes. Depending on how many pizzas you are making, you can freeze one of the dough balls at this point. *

6. Remove your pizza stone/baking pan and generously grease the entire surface with olive oil or with nonstick cooking spray. Sprinkle with cornmeal.

7. Roll each dough ball out onto a lightly floured surface. Transfer pizza dough to your baking sheet. Pinch the edges to create a rimmed crust.  Lightly brush the top of the crust with olive oil and sprinkle with garlic salt. Make a few holes in the dough with a fork to prevent the dough from bloating.

8. Bake for 12 minutes at 475 degrees F with your favorite toppings. Broil for a few minutes or until cheese is golden.

*Freezing and Thawing Instructions:
After the 2 balls of pizza dough have risen, you can freeze one or both of the balls of dough. Lightly spray all sides of the dough balls with nonstick spray. Put the dough into separate ziploc bags, squeezing out the air. When you want to use, thaw the dough in the refrigerator for about 12 hours then place on your counter for about 30 minutes to bring to room temperature. Continue to Step 6.
{adapted from Carlsbad Cravings}
Homemade Pizza Dough Ball

You Might Also Like:

BBQ Chicken Apple Pizza

Chicken Apple BBQ Pizza Piece of Home


Read More

Homemade BBQ Sauce

Today I am sharing my favorite BBQ Sauce recipe! BBQ Sauce is very often the secret ingredient to many recipes. It’s what brings wraps it all up into what we call flavorful! 

Homemade BBQ Sauce Piece of Home

I realized that next week, we are celebrating our sixth wedding anniversary! That means we passed the first notable milestone and are well into our way towards the next (10 years)

It will be here before we know it! When we were living in San Diego one of our most favorite date night stops was at Phil’s BBQ. If you do not know Phil, you need to go meet him. Make it a priority.

Phil has just got that secret touch to the most perfect BBQ Sauce I have ever tasted. It just melts on your tongue making you want more. It’s finger lickin’ good! That’s why you get tons of napkins and even a whole sink to wash up in when you are done!

It’s a get-in-there and enjoy kinda meal. Totally a guys style but not first date unless you are up for a really fun time!

So I’m going to share with you today my take on a simple finger lickin’ good BBQ sauce that will have you coming back for more. Not quite Phil’s but deliciously homemade!

Homemade BBQ Sauce

Homemade BBQ Sauce Print Button 50

Recipe Card Border 2

Ingredients:

5 cups Ketchup
1/2 cups Cider Vinegar
2 Tablespoons Honey
2 Tablespoons Brown Sugar
1 Tablespoon Molasses
1/2 Tablespoons Paprika
1/2 Tablespoons Garlic Powder
1 Tablespoon Honey Mustard
2 Tablespoons Worcestershire Sauce
pinch of cayenne powder

Directions:

1. Place all the ingredients in a large saucepan. Stir until well combined on medium heat.

2. Allow mixture to simmer about 30-45 minutes or until thickened.

3. Store in the refrigerator for up to 2 weeks.

Enjoy!

Homemade BBQ Sauce Cooked

This Goes Great With:

BBQ Apple Chicken Pizza

Chicken Apple BBQ Pizza Piece of Home

Read More

BBQ Chicken Apple Pizza

BBQ Chicken Apple Pizza is a family friendly Friday night pizza that is not only beautiful but the best flavor on the block!

Chicken Apple BBQ Pizza Piece of Home

It must be the glaze of the BBQ Sauce but this pizza can only be described as beautiful!

Until you taste it and then it’s every word you can possibly think of for delicious. Seriously, this pizza packs a punch of flavor!

Chicken Apple BBQ Pizza with apples

Layer all the toppings on your crust. Which by the way, you’ve gotta try this killer homemade pizza crust!

Just boil the chicken and shred it with a fork. Sprinkle it all over the pizza and add the rest of the toppings.

Chicken Apple BBQ Pizza with Chicken

I love a thick crust and with lots of toppings! That in my mind is the best kind of pizza out there! I think that Americans are known more for their pizza than hamburgers. What do you think? I think America could have pizza be their namesake food.

Until you walk into In-N-Out and then I forget all about pizza….

Chicken Apple BBQ Pizza with Cilantro

Grab some friends for your Friday night pizza night and enjoy this delicious pizza together!

Chicken Apple BBQ Pizza Piece

BBQ Chicken Apple Pizza Print Button 50

Recipe Card Border 2

Ingredients:

4 Artisan-Style Flat bread or Homemade Pizza Crust
1 lb chicken, cooked, shredded
1 jar pizza sauce or Homemade pizza sauce
2 medium apples, sliced thinly
1/2 red onion sliced thinly
1/4 cilantro, minced
2 cups shredded cheese
BBQ Sauce

Directions:

1. Prepare your pizza dough. Homemade pizza dough is easy and delicious or canned pizza dough or flatbreads would work too.

2. In a large pot, boil the chicken until no longer pink. Shred with a fork into small pieces.

3. Spread the pizza sauce over the prepared crust.

4. Top with the remaining ingredients starting with the chicken, apples, onion, cilantro, BBQ Sauce, then cheese.

5. Bake at 400 degrees F until warmed and cheese has melted.

Enjoy!

We love the flavor packed into this pizza! It’s one of our favorites! BBQ to please the hubby and delicacy of cilantro and red onion to make everyone happy! This one is a winner!

Chicken Apple BBQ Pizza with bbq sauce

You Might Also Like:

Homemade Pizza Sauce

Tomato Sauce Piece of Home

Read More

Homemade Tomato Sauce

A thick sauce perfect for pizzas or spaghetti. This simple tomato base is the answer for all meals quick! A much cheaper and healthier option too!

Tomato Sauce Piece of Home

I’ve never been one to make my own sauces. Why? I like convenience. Don’t we all? And making my own sauce is not convenient.. or so I thought.

If anyone told me I’d be making my own homemade tomato sauce, pizza sauce, spaghetti sauce, etc..  a year ago I would’ve laughed at them. And yet…

Here I am. Making my own sauces! You guys, it’s easy! How come no one ever told me how delicious making your own sauces is and how convenient too!

Tomato Sauce - Chopped Tomatoes

I made a big batch of this and froze the rest in portioned sized bags so it’s ready to go for our quick pasta meals and our Friday night pizza nights!

Tomato Sauce with Garlic

Homemade Tomato Sauce Print Button 50

Recipe Card Border 2

Ingredients:

6 large tomatoes, quartered
8 garlic cloves, halved
2 medium onion, quartered
garlic salt
pepper
1 can tomato paste (only for making pizza sauce)

Directions:

1. Preheat the oven to 350 degrees F. In a large casserole dish, add the quartered tomatoes, garlic, onion, garlic salt, and pepper.

2. Place the pan in the oven and bake for about 1 hour. The mixture should be juicy. Allow to cool 10 minutes.

3. Pour the tomato mixture into a blender and blend on high for 2-3 minutes.

4. Enjoy warm! You can use this sauce for spaghetti, dips, etc… If you want to make this a pizza sauce, add 1 can of tomato paste to the blender while you are blending. This will make it a thicker sauce for the pizza.

If you are just making pasta sauce then omit the tomato paste. If you are wanting pizza sauce add the tomato paste. I have used just the regular sauce as pizza sauce and it was just fine. Just don’t use as much so it’s not too runny on your pizza!

Tomato Sauce - Spoonful

Please share below your experiences making your own sauces! I’d love to hear what you make that brings a little convenience into your busy days!

Alyssa Signature


Read More

Creamy Chicken Bake

 Like a pizza pocket, this creamy chicken bake holds lots of yumminess inside! 

Chicken Bake Roll Piece of Home

After trying my hand at some homemade crescent rolls, I was really excited to try this chicken bake or chicken hot pocket as some of you might call it, using the same dough!

Another good name for it would be, Delicious!

It was so much fun making this crisscross design and making a comfort food that we just loved!

Chicken Bake Cheese

You can also used canned crescent rolls if you are out of time and convenience is your friend. But if not, this dough recipe is really pretty easy!

My dough turned out really thick so I think I will roll it a little thinner next time and even add some veggies like broccoli to the mixture! You can really fill this up with whatever you want!

Chicken Bake Slice

Creamy Chicken Bake Print Button 50

Recipe Card Border 2

Ingredients:

1 lb chicken, boiled, shredded
1 small onion, diced
4-6 oz. cream cheese, softened
3 Tbs. melted butter, divided
2 Tbs. milk
salt and pepper, to taste
homemade crescent dough

Directions:

1. In a large mixing bowl, mix together the crescent dough ingredients. Cover and place in a warm place to rise.

1. In a medium sauce pan, boil the chicken until no longer pink. Allow to cool, then shred with a fork.

2. Mix the chicken with the onion, cream cheese, butter, milk, and salt and pepper.

3. Once the crescent dough has risen, punch down and roll out into a large rectangle about 14in. x 20in.

4. Place the chicken mixture in the middle of the rectangle, leaving a large space of dough on either side of the mixture.

5. Using kitchen scissors, cut the dough on both sides into 1 inch strips. Starting at one side, crisscross the strips over the mixture until it is completely covered and the dough is shaped like a loaf.

6. Bake at 400 degrees F. for 20-25 minutes or until golden brown. Sprinkle the top with cheese the last 5 minutes if desired.

Alyssa Signature

Read More